Friday, November 6, 2015
How to setup Shibboleth Identity Provider 3 with Django Website
Recently I was given a task to setup Shibboleth SSO to integrate different python websites with single sign on. There is official shibboleth documentation, but it's quite difficult to understand, especially for beginners. After spending days of googling and reading different forums, I decided to create step-by-step guide for beginners on how to install Shibboleth SSO with django website.
We will use the following assumptions:
1. OS: Debian Jessie x64
2. /etc/hosts:
3. LDAP will be used to store users credentials and to authenticate them.
4. Django website will be used as a Service Provider.
1. Download and unzip Shibboleth IdP 3
2. Create shibboleth directory and give permissions to current user:
3. Run installation script
4. If you're deploying shibboleth for the first time, you may experience different problems. So I recommend to log everything possible. To do that open file /opt/shibboleth-idp/conf/logback.xml and change log level to "ALL":
1. Install openjdk-7-jdk and tomcat7:
2. To troubleshoot tomcat problems, refer to log files located at "/var/log/tomcat7/"
3. Next we need to make tomcat aware of shibboleth. It can be done by creating /etc/tomcat7/Catalina/localhost/idp.xml file and pasting the following content:
4. Let's add our user to tomcat group and change shibboleth permissions to allow tomcat's access:
5. One of shibboleth pages (http://localhost:8080/idp/profile/status) depends on jstl library, which is not included to shibboleth libs, so we will need to download it manually and rebuild war file:
6. (Optional) Edit file /etc/tomcat7/web.xml to avoid error: "Resource specification not allowed here for source level below 1.7":
7. Now let's restart tomcat:
1. Install nginx:
2. Create nginx file /etc/nginx/sites-enabled/idp_proxy.conf with the following content:
3. Add entry to /etc/tomcat7/server.xml to correctly handle nginx proxy requests:
4. Restart nginx:
1. Install LDAP
2. Add test user to LDAP using command:
To test Shibboleth I created django website based on djangosaml2 module. It is very basic and there is only one page with login button just to demonstrate SSO functionality.
1. Clone django sp1 (if you don't have git, download as zip file):
2. Generate certificate/key:
3. All default settings should work out of the box if you follow this article assumptions. But in case you need to customize host name or key path, just edit sp1/common_settings.py file.
4. Deploy SP as regular django website, accessable at 'sp1.localhost'.
By default shibboleth uses LDAP Password authentication. And we will use it as well.
So LDAP is a storage of our users. When somebody tries to login, shibboleth will go to LDAP to check login/password (authenticate). If authentication succeeds, then next step for shibboleth is to resolve attributes (like email, user name, etc). For attribute resolution we will also use LDAP, so all attributes are being retrieved from LDAP directory. And the final (third) step, when all attributes are collected, is to release them in SAML assertion. In this example we will use only one attribute 'uid' to match username.
1. Add LDAP parameters to file /opt/shibboleth-idp/conf/ldap.properties
2. Setup attribute resolution by editing file /opt/shibboleth-idp/conf/attribute-resolver.xml. Leave only one AttributeDefinition entry and one DataConnector:
3. Setup attribute filtering (resolution) by editing file /opt/shibboleth-idp/conf/attribute-filter.xml
1. Copy idp-metadata.xml to SP website:
2. Add sp_metadata to IDP by editing file /opt/shibboleth-idp/conf/metadata-providers.xml and adding the following element:
3. Restart SP1 and IDP.
1. Go to sp1.localhost and click 'login':
2. You will be redirected to idp.localhost, where you should enter login/password (test/123 in our case):
3. IDP redirects you back to SP, where your username is displayed:
We will use the following assumptions:
1. OS: Debian Jessie x64
2. /etc/hosts:
127.0.0.1 idp.localhost sp1.localhost ldap.localhostwhere idp, sp1, ldap - accordingly host names of Identity Provider, Service Provider and Ldap.
3. LDAP will be used to store users credentials and to authenticate them.
4. Django website will be used as a Service Provider.
Shibboleth installation
1. Download and unzip Shibboleth IdP 3
cd ~
wget http://shibboleth.net/downloads/identity-provider/3.1.2/shibboleth-identity-provider-3.1.2.tar.gz
tar -xvzf shibboleth-identity-provider-3.1.2.tar.gz
2. Create shibboleth directory and give permissions to current user:
sudo mkdir /opt/shibboleth-idp
sudo chown "$USER" /opt/shibboleth-idp/
3. Run installation script
cd shibboleth-identity-provider-3.1.2/bin
JAVA_HOME=/usr/lib/jvm/java-7-openjdk-amd64/ ./install.sh
Enter installation parameters:
Source Directory: /home/test/shibboleth-identity-provider-3.1.2
Installation Directory: /opt/shibboleth-idp
Hostname: idp.localhost
SAML EntityID: https://idp.localhost/idp/shibboleth
Attribute Scope: localhost
TLS Private Key Password: some password
Cookie Encryption Key Password: some password2
If everything goes well you should see a message: "BUILD SUCCESSFUL"
4. If you're deploying shibboleth for the first time, you may experience different problems. So I recommend to log everything possible. To do that open file /opt/shibboleth-idp/conf/logback.xml and change log level to "ALL":
<!-- Logs IdP, but not OpenSAML, messages -->
    <logger name="net.shibboleth.idp" level="ALL"/>

    <!-- Logs OpenSAML, but not IdP, messages -->
    <logger name="org.opensaml.saml" level="ALL"/>

    <!-- Logs LDAP related messages -->
    <logger name="org.ldaptive" level="ALL"/>
When something doesn't work as expected, just use this command to read logs:tail -f /opt/shibboleth-idp/logs/*.log
Tomcat installation
Because shibboleth is java application, we will need to install java sdk and tomcat webserver.1. Install openjdk-7-jdk and tomcat7:
sudo apt-get install openjdk-7-jdk tomcat7
2. To troubleshoot tomcat problems, refer to log files located at "/var/log/tomcat7/"
3. Next we need to make tomcat aware of shibboleth. It can be done by creating /etc/tomcat7/Catalina/localhost/idp.xml file and pasting the following content:
<Context docBase="/opt/shibboleth-idp/war/idp.war"
         privileged="true"
         antiResourceLocking="false"
         antiJARLocking="false"
         unpackWAR="false"
         swallowOutput="true" >
</Context>
4. Let's add our user to tomcat group and change shibboleth permissions to allow tomcat's access:
sudo gpasswd -a "$USER" tomcat7
sudo chown -R tomcat7:tomcat7 /opt/shibboleth-idp
You may need to logout/login to take effect of your group permissions.
5. One of shibboleth pages (http://localhost:8080/idp/profile/status) depends on jstl library, which is not included to shibboleth libs, so we will need to download it manually and rebuild war file:
wget http://repo1.maven.org/maven2/javax/servlet/jstl/1.2/jstl-1.2.jar
mv jstl-1.2.jar /opt/shibboleth-idp/webapp/WEB-INF/lib/
sudo JAVACMD=/usr/bin/java /opt/shibboleth-idp/bin/build.sh -Didp.target.dir=/opt/shibboleth-idp
If everything is OK, you should see a message "BUILD SUCCESSFUL".
6. (Optional) Edit file /etc/tomcat7/web.xml to avoid error: "Resource specification not allowed here for source level below 1.7":
<servlet>
        <servlet-name>jsp</servlet-name>
        <servlet-class>org.apache.jasper.servlet.JspServlet</servlet-class>
        <init-param>
            <param-name>fork</param-name>
            <param-value>false</param-value>
        </init-param>
        <init-param>
            <param-name>xpoweredBy</param-name>
            <param-value>false</param-value>
        </init-param>
        <load-on-startup>3</load-on-startup>

        <init-param>
            <param-name>compilerSourceVM</param-name>
            <param-value>1.7</param-value>
        </init-param>
        <init-param>
            <param-name>compilerTargetVM</param-name>
            <param-value>1.7</param-value>
        </init-param>
</servlet>
7. Now let's restart tomcat:
sudo service tomcat7 restartAt this stage shibboleth should work and you may check status page:
http://localhost:8080/idp/profile/status
Nginx installation
Nginx webserver will stay as proxy between Tomcat and Internet. It will handle ssl requests and redirect them to tomcat on http port (8080).1. Install nginx:
sudo apt-get install nginx-full
2. Create nginx file /etc/nginx/sites-enabled/idp_proxy.conf with the following content:
upstream tomcat_server {
        # Tomcat is listening on default 8080 port
        server 127.0.0.1:8080 fail_timeout=0;
}
server {
        listen 127.0.0.1:443 ssl;
        server_name idp.localhost;

        ssl_certificate /etc/nginx/ssl/nginx.crt;
        ssl_certificate_key /etc/nginx/ssl/nginx.key;

        location / {
            proxy_set_header X-Forwarded-For $proxy_add_x_forwarded_for;
            proxy_set_header Host $http_host;
            proxy_set_header X-Forwarded-Proto https;
            proxy_redirect off;
            proxy_connect_timeout      240;
            proxy_send_timeout         240;
            proxy_read_timeout         240;
            # note, there is not SSL here! plain HTTP is used
            proxy_pass http://tomcat_server;
        }
}
Also create folder "/etc/nginx/ssl/" and put some ssl certificate/key there:sudo mkdir -p /etc/nginx/ssl/ sudo openssl req -x509 -nodes -days 365 -newkey rsa:2048 -keyout /etc/nginx/ssl/nginx.key -out /etc/nginx/ssl/nginx.crt
3. Add entry to /etc/tomcat7/server.xml to correctly handle nginx proxy requests:
<Host name="localhost"  appBase="webapps"
            unpackWARs="true" autoDeploy="true">
...
    <Valve className="org.apache.catalina.valves.RemoteIpValve"
                remoteIpHeader="x-forwarded-for"
                remoteIpProxiesHeader="x-forwarded-by"
                protocolHeader="x-forwarded-proto"/>
4. Restart nginx:
sudo service nginx restartTo check that nginx works as expected, try to access status page:
https://idp.localhost/idp/profile/status
LDAP installation
1. Install LDAP
sudo apt-get install slapd ldap-utils
sudo dpkg-reconfigure slapd
dpkg-reconfigure will ask you some questions, here are the answers:
Omit OpenLDAP server configuration?: No
DNS domain name: ldap.localhost
Organization name: test
Administrator password: 123
Confirm password: 123
Database backend to use: HDB
Do you want the database to be removed when slapd is purged?: No
Move old database?: Yes
Allow LDAPv2 protocol? No
2. Add test user to LDAP using command:
ldapadd -x -D "cn=admin,dc=ldap,dc=localhost" -w 123 <<EOF
dn: cn=test,dc=ldap,dc=localhost
objectClass: inetOrgPerson
cn: test
uid: test
UserPassword: 123
sn: test
EOF
It will create user with name 'test' and password '123'.
Django SP installation
To test Shibboleth I created django website based on djangosaml2 module. It is very basic and there is only one page with login button just to demonstrate SSO functionality.
1. Clone django sp1 (if you don't have git, download as zip file):
cd ~
git clone https://github.com/serglopatin/sp1.git
2. Generate certificate/key:
cd ~/sp1/sp1/
openssl req -x509 -nodes -days 365 -newkey rsa:2048 -keyout sp1_key.key -out sp1_cert.pem
3. All default settings should work out of the box if you follow this article assumptions. But in case you need to customize host name or key path, just edit sp1/common_settings.py file.
4. Deploy SP as regular django website, accessable at 'sp1.localhost'.
Shibboleth Authentication and Attributes
By default shibboleth uses LDAP Password authentication. And we will use it as well.
So LDAP is a storage of our users. When somebody tries to login, shibboleth will go to LDAP to check login/password (authenticate). If authentication succeeds, then next step for shibboleth is to resolve attributes (like email, user name, etc). For attribute resolution we will also use LDAP, so all attributes are being retrieved from LDAP directory. And the final (third) step, when all attributes are collected, is to release them in SAML assertion. In this example we will use only one attribute 'uid' to match username.
1. Add LDAP parameters to file /opt/shibboleth-idp/conf/ldap.properties
...
idp.authn.LDAP.ldapURL = ldap://ldap.localhost
idp.authn.LDAP.useSSL = false
idp.authn.LDAP.useStartTLS = false
idp.authn.LDAP.returnAttributes = uid
idp.authn.LDAP.baseDN = dc=ldap,dc=localhost
idp.authn.LDAP.bindDN = cn=admin,dc=ldap,dc=localhost
idp.authn.LDAP.bindDNCredential = 123
idp.authn.LDAP.userFilter = (uid={user})
idp.authn.LDAP.dnFormat = uid=%s,dc=ldap,dc=localhost
...
(other parameters leave as default)2. Setup attribute resolution by editing file /opt/shibboleth-idp/conf/attribute-resolver.xml. Leave only one AttributeDefinition entry and one DataConnector:
...
<resolver:AttributeDefinition xsi:type="ad:Simple" id="uid" sourceAttributeID="uid">
        <resolver:Dependency ref="myLDAP" />
        <resolver:AttributeEncoder xsi:type="enc:SAML2String" name="urn:oid:0.9.2342.19200300.100.1.1" friendlyName="uid" />
        <resolver:AttributeEncoder xsi:type="enc:SAML1String" name="urn:mace:dir:attribute-def:uid" />
</resolver:AttributeDefinition>
...
<resolver:DataConnector id="myLDAP" xsi:type="dc:LDAPDirectory"
        ldapURL="%{idp.attribute.resolver.LDAP.ldapURL}"
        baseDN="%{idp.attribute.resolver.LDAP.baseDN}"
        principal="%{idp.attribute.resolver.LDAP.bindDN}"
        principalCredential="%{idp.attribute.resolver.LDAP.bindDNCredential}"
        useStartTLS="%{idp.attribute.resolver.LDAP.useStartTLS:true}">
        <dc:FilterTemplate>
            <![CDATA[
                %{idp.attribute.resolver.LDAP.searchFilter}
            ]]>
        </dc:FilterTemplate>
</resolver:DataConnector>

...
3. Setup attribute filtering (resolution) by editing file /opt/shibboleth-idp/conf/attribute-filter.xml
...
<afp:AttributeFilterPolicy id="SP1_attrib_policy">
        <!--
        <afp:PolicyRequirementRule xsi:type="basic:ANY"/>
        -->
        <afp:PolicyRequirementRule xsi:type="basic:AttributeRequesterString" value="http://sp1.localhost/saml2/metadata/" />
        <afp:AttributeRule attributeID="uid">
            <afp:PermitValueRule xsi:type="basic:ANY" />
        </afp:AttributeRule>
</afp:AttributeFilterPolicy>
...
Make sure that value "http://sp1.localhost/saml2/metadata/" is correct (you can find this value in SP metadata file), otherwise attribute will not be released to SP. Alternatively you can uncomment "basic:ANY" rule, so that attribute will be released to any SP.SP and IDP Integration
Integration of SP and IDP is very simple. First you need to copy idp_metadata.xml to SP. Second, copy sp1_metadata.xml to IDP. That's it.1. Copy idp-metadata.xml to SP website:
cp /opt/shibboleth-idp/metadata/idp-metadata.xml ~/sp1/sp1/idp_metadata.xml
2. Add sp_metadata to IDP by editing file /opt/shibboleth-idp/conf/metadata-providers.xml and adding the following element:
<MetadataProvider
                id="SP1Metadata"
                xsi:type="FileBackedHTTPMetadataProvider"
                metadataURL="http://sp1.localhost/saml2/metadata/"
                backingFile="%{idp.home}/metadata/sp1_metadata.xml">
</MetadataProvider>
So now IDP should automatically download SP metadata from "http://sp1.localhost/saml2/metadata/" and save it to local file '/opt/shibboleth-idp/metadata/sp1_metadata.xml'.3. Restart SP1 and IDP.
How it works in action
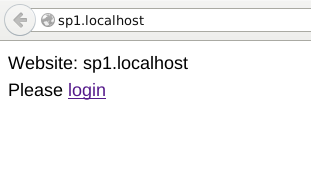
1. Go to sp1.localhost and click 'login':
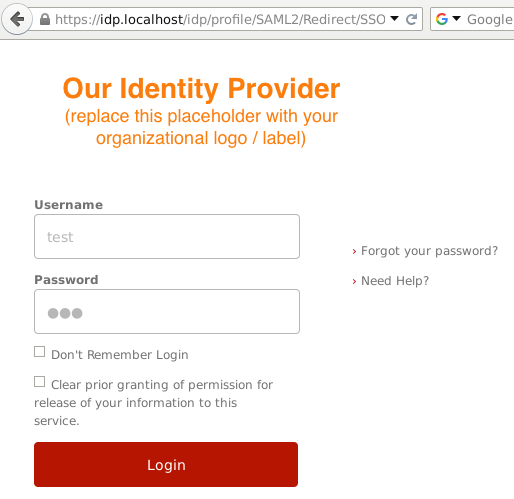
2. You will be redirected to idp.localhost, where you should enter login/password (test/123 in our case):
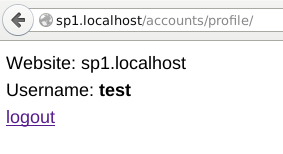
3. IDP redirects you back to SP, where your username is displayed:
Conclusion
This is just basic configuration of Shibboleth SSO that you need to adjust to your needs. For example, instead of LDAP authentication you can configure Shibboleth to authenticate against RDBMS. But that is another long story, which I'll probably cover in some of my future posts.
Subscribe to:
Post Comments (Atom)
Hi Sergey,
ReplyDeleteIts very good guide for beginners,can you please tell me know how to Deploy SP as regular django website, accessable at 'sp1.localhost'.
I am new to django website , how to setup django in step by step or can you refer me any good blog.
Regads,
Gowtham
Hi Gowtham,
DeleteI can recommend this link on how to deploy Django website: https://docs.djangoproject.com/en/dev/howto/deployment/
Hi Sergey,
ReplyDeleteThanks for your quick replay, i went through the site and installed django but its very confusing as i am new to this all python,django.
1) should i also install anyDB
2) should i place your sp1 folder in any webserver.
3) should i use pip install -r requirements.txt .
Can you please give high level step to deploy your django app,it would help me allot of time.
you can also replay to agoutamreddy@gmail.com
Thanks & Regadrs,
Gowtham.
Hi,
ReplyDeleteI'm running django on pycharm on http://sp1.localhost:8080/. When I clicked login, it redirects to http://sp1.localhost:8080/saml2/login with Server Error 500. Where did i go wrong?
After reading https://github.com/knaperek/djangosaml2, i realised i missed out the most important step, which is to install xmlsec1.
DeleteHi,
ReplyDeleteI can't logout. I get: LogoutError at /saml2/logout/ Has anyone experienced this?
Cheers, Dave
Hi Quasimotoca,
ReplyDeleteI tried all steps above for this project running but could not successfully run. How did you run it. have you changed anything in this danjgo project or have you used some other projects as SP.
Hi Quasimotoca,
ReplyDeleteI have followed all the above steps to make this project run on my laptop (ubuntu 14), but without success.
How did you successfully run? Did you change it in code or have you used another project as SP>
Regards
Raj