Friday, November 25, 2016
How to deploy Trac on Debian Jessie with uwsgi and nginx
Dear all,
Today I'm going to deploy one popular bug tracking tool, which is known as Trac. At first look you may ask: why is it looking so weird? Was it designed in early 90's? Well, yes, interface is very minimalistic. But on the other side it has own benefits - it's absolutely free, written in Python and open source.
Below we will deploy Trac on Debian Jessie with Postgresql, uwsgi and nginx.
As everywhere else, I'm going to stick to my scheme, which I find convenient. If you have any suggestions what can be done better, feel free to tell me in comments or by email.
Also I'm assuming that you know how to install uwsgi and nginx packages. I will only show their trac configuration files. But if you need more info, read how to build uwsgi from source.
1. Create directory trac_www, which will be root for everything else related.
2. Create venv directory and install the following requirements:
3. Create trac database and user:
4. Initialize trac project:
5. Collect static resources into separate directory (it will be used by nginx later):
6. Set up permissions, directories and files:
7. Create uwsgi config file:
8. Enable uwsgi vassal:
9. Create nginx config file:
10. Enable nginx config and reload nginx:
We've done basic setup of trac. If you try to open http://trac.mycompany.com in your browser, you should see something similar to this:
Next thing you should do - is to play a bit with your trac.ini file, fix logo and other stuff. I leave this creative part for you.
Also I recommend installing these two plugins:
Today I'm going to deploy one popular bug tracking tool, which is known as Trac. At first look you may ask: why is it looking so weird? Was it designed in early 90's? Well, yes, interface is very minimalistic. But on the other side it has own benefits - it's absolutely free, written in Python and open source.
Below we will deploy Trac on Debian Jessie with Postgresql, uwsgi and nginx.
As everywhere else, I'm going to stick to my scheme, which I find convenient. If you have any suggestions what can be done better, feel free to tell me in comments or by email.
Also I'm assuming that you know how to install uwsgi and nginx packages. I will only show their trac configuration files. But if you need more info, read how to build uwsgi from source.
1. Create directory trac_www, which will be root for everything else related.
sudo mkdir /opt/trac_www
sudo chown $USER:$USER trac_www/
2. Create venv directory and install the following requirements:
cd /opt/trac_www
virtualenv venv
source venv/bin/activate
pip install psycopg2
pip install trac
at the time of writing I have these versions:
Genshi==0.7
Trac==1.2
psycopg2==2.6.2
3. Create trac database and user:
sudo -u postgres createuser -S -D -R -P trac
sudo -u postgres createdb -O trac trac -E utf-8
4. Initialize trac project:
cd /opt/trac_www
./venv/bin/trac-admin /opt/trac_www/tracproject initenv
You will be asked some questions. The only one interesting is about database. Use this string as a db connection (123 is db password):
postgres://trac:123@127.0.0.1/tracAfter this command finishes, you can already check how trac looks at localhost in your browser with this command:
tracd --port 8000 /opt/trac_www/tracprojectBut this is only for testing purposes. We will continue configuring it for production environment using nginx and uwsgi.
5. Collect static resources into separate directory (it will be used by nginx later):
cd /opt/trac_www
./venv/bin/trac-admin /opt/trac_www/tracproject/ deploy /opt/trac_www/www
UWSGI part
6. Set up permissions, directories and files:
cd /opt/trac_www/

#create config directory
mkdir conf
cd conf

#create folder for sock file
mkdir tmp
sudo chown www-data:www-data tmp

#create log file
touch uwsgi.log
sudo chown www-data uwsgi.log

#trac ini file has strict permissions, allow webserver to access it:
sudo chown www-data:www-data /opt/trac_www/tracproject/conf/trac.ini
7. Create uwsgi config file:
touch /opt/trac_www/conf/uwsgi.iniand put this content into it:
[uwsgi]
chdir           = /opt/trac_www/
home            = /opt/trac_www/venv

# 'plugins-dir' and 'plugin' are only here
# because I've built uwsgi with plugin support
# but you may comment it
plugins-dir     = /usr/lib/uwsgi/
plugin          = python27

env = TRAC_ENV=/opt/trac_www/tracproject
module = trac.web.main:dispatch_request
logto = /opt/trac_www/conf/uwsgi.log
master          = true
processes       = 1
socket          = /opt/trac_www/conf/tmp/uwsgi.sock
chmod-socket    = 660
vacuum          = true
8. Enable uwsgi vassal:
sudo ln -s /opt/trac_www/conf/uwsgi.ini /etc/uwsgi/vassals/trac.iniNow uwsgi should pick up your uwsgi.ini file and start accepting requests. In case of success, your uwsgi.log should contain this at the end:
*** uWSGI is running in multiple interpreter mode ***
gracefully (RE)spawned uWSGI master process (pid: 15004)
spawned uWSGI worker 1 (pid: 15013, cores: 1)
Nginx part
9. Create nginx config file:
touch /opt/trac_www/conf/nginx.confand put this content into it:
server {
    listen 80;
    server_name trac.mycompany.com;
    charset     utf-8;
    location / {
        uwsgi_pass  unix:/opt/trac_www/conf/tmp/uwsgi.sock;
        include     /opt/trac_www/conf/uwsgi_params;
    }
    location /chrome/common {
        alias /opt/trac_www/www/htdocs/common;
    }
    location /chrome/site {
        alias /opt/trac_www/www/htdocs/site;
    }
}
10. Enable nginx config and reload nginx:
sudo ln -s /opt/trac_www/conf/nginx.conf /etc/nginx/sites-enabled/trac.conf
sudo systemctl reload nginx
Bottom line
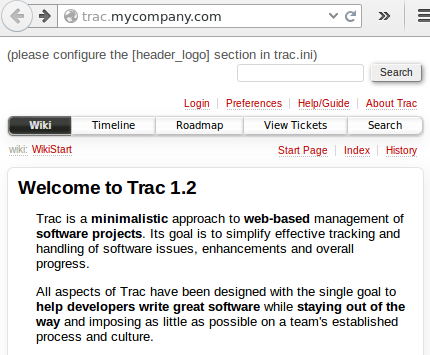
We've done basic setup of trac. If you try to open http://trac.mycompany.com in your browser, you should see something similar to this:
Next thing you should do - is to play a bit with your trac.ini file, fix logo and other stuff. I leave this creative part for you.
Also I recommend installing these two plugins:
TracAccountManager
TracAutocompleteUsersPlugin
The first one adds sign up form and allows registration for your users. The second one adds useful autocomplete feature, when creating new ticket and entering first letters of user name, trac automatically highlights possible combinations for you.
Subscribe to:
Post Comments (Atom)
No comments:
Post a Comment